NEWT MOBILE - Contacts
To access all the contacts, tab on the Contacts icon at the bottom of the screen. In the Contacts window, you will notice two tabs at the top of the screen. Address Book and Web Service.
The Address Book tab contains contacts that you would have synced from your cell phone (if you chose to sync upon start up) and you can add contacts manually here as well.
Address Book
Adding New Contacts
Touch the Add + icon to add new contacts, and follow the instruction on the screen to save the contact on the phone book.
Alternatively, open the Keypad tab, use the dialer tab to dial phone numbers, tap + Add to Contacts, and then select Create New Contact or Add to Existing Contact. Follow the instructions on the screen to save as a new contact or add to an existing contact.
Editing Contacts
Users can update information such as names or add new numbers to existing contacts in the address book.
Open the Contacts tab.
Tap a contact that needs updates.
Tap Edit.
Make changes and then tap DONE.
Web Service (PBX Directory Listing)
This list contains extensions within your PBX environment as well as contacts your administrator may have loaded to the PBX in the Global Directory listing. This listing is auto populated and can only be changed by the PBX administrator. Showing or hiding listings will affect all users within your PBX environment.
Quick Dials
Just like a “Favourites list”, add or create a call shortcut in the Quick Dial tab for the contacts that the users call frequently. A tap on a quick dial places the call instantly.
To create Quick Dials:
Open the Quick dial tab.
Tap EDIT.
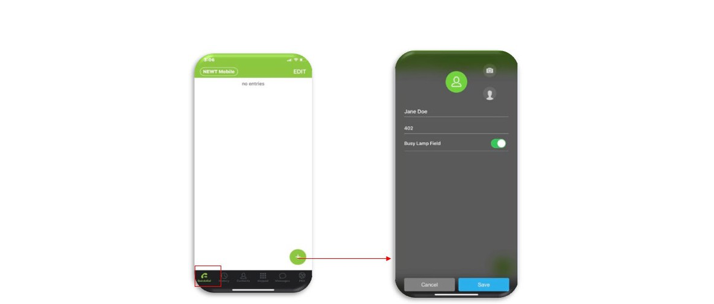
Tap the Add icon. A blank quick dial form displays.
Fill in the name and phone number fields or alternatively, touch the contact icon and select an existing contact's phone number.
(Optional) Touch Camera to take or assign an image to a quick dial contact.
(Optional) Toggle Busy Lamp Field on to provide extension status information (On Call / Off Call)
Tap the Save button.
Tap DONE.

Related Articles
NEWT MOBILE - Messages
How to use messages in Mobile App (iOS)
NEWT MOBILE - Call Handling
Making calls on your NEWT Mobile App
NEWT MOBILE - Set up and Installation (iOS)
Instructions for setting up your NEWT Mobile on iOS
NEWT Nitro FTTP - BYOD Option
Installation Information for FTTP - BYOD
Using MS TEAMS with NEWT
How to use MS Teams Dialer with NEWT
NEWT DESKTOP - Voicemail
How to manage voicemail on NEWT Desktop App
