Extension Settings for Users
Your extension on the NEWT PBX can be accessed to make adjustments to your extension settings and access information.
Your administrator will need to provide access for you to the following Extension Features at their discretion:
Extension Settings
Call Flow
Hardware Settings (for Grandstream Phones only)
Call Recordings
Extension Log In Instructions
Once credentials have been set up, you will receive an email from do-not-reply@fibernetics.ca.
The email will contain a link to the portal, your username and a password link.
Click on the Password Link and immediately copy the password that is revealed. You will need to capture and save the password that is revealed in the password link for future log in access!
Then click on the link to the portal provided in the main email.
Enter the username provided in the email
Enter the Password you just copied
You will then be prompted to enter your 2FA code. If your administrator added an SMS texting number when setting you up, you will receive your 2FA via text. If not, you will receive the 2FA by email.
User Access looks like this (note the call recording tab will not be seen if access was not granted):
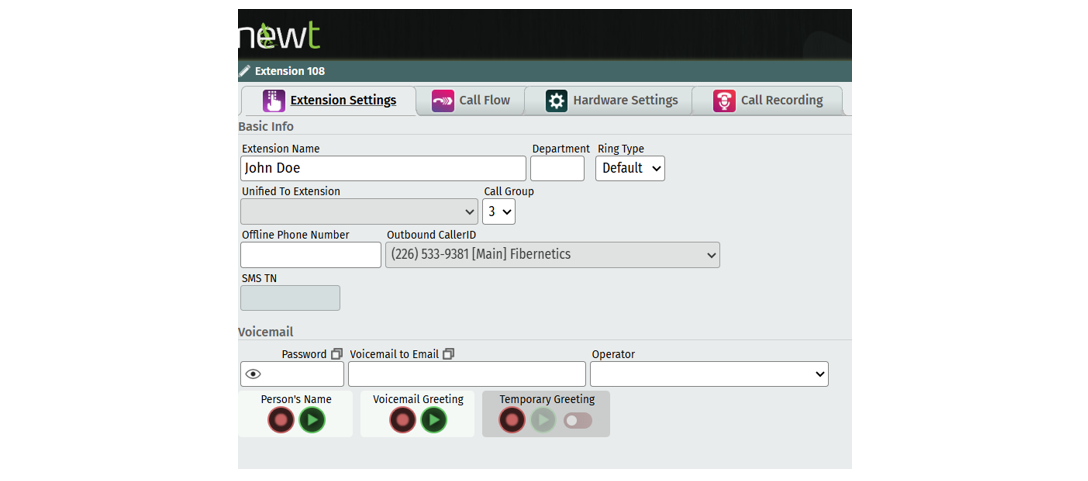
Extension Settings
Your extension settings will have been completed during the initial set up by NEWT or additionally by your administrator.
However, there are some settings you may want to update:
Ring Type - This field will appear for Poly or Grandstream Phone users. Use the drop-down list to choose a distinct ring for the phone. The ring types correspond to the standard ring types available on your phone.
Offline Phone Number - The NEWT PBX is structured in a Hybrid cloud environment to allow for automatic disaster recovery, by having the ability to forward calls if ANY local condition (i.e.: power failure) occurs. This will forward calls that are directly routed to the extension, to the Offline Number entered. Note that while virtual extensions have the option to add an offline number, it only works if the virtual ext. dial plan points to a SIP device on the PBX.
Voicemail Password - Add or reset passwords for extensions by entering a new password and saving your change. Use the Eye Icon to view the password.
Voicemail to Email - Enter the email address you would like the voicemail recording to go to.
Operator - Select the Extension you would like calls to go to if a caller hits 0 (zero out) while in your voicemail message.
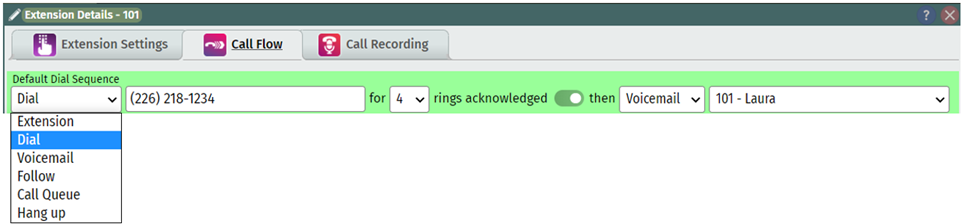
Call Flow Settings
Call Flow Dial Sequences are the chain of steps that occur when a Local Extension is called, either through direct dialing, or as part of some other call routing or extension dial plan. Changing the dial sequence is as simple as knowing what you want to have happen once the call hits the extension.
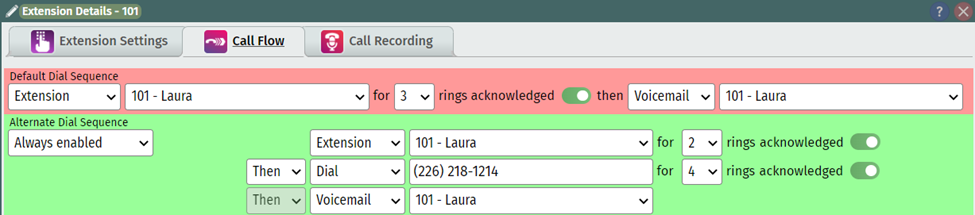
Default Dial Sequence
This is a simple configuration suitable for most generic extensions. It allows for a maximum of two steps, on a persistent basis. Typically, an extension rings four times, and then goes to that extension’s voicemail. You can, however, tell the call to go to (“follow”) another extension, a call queue or hang up after ringing the extension. Simply choose the behaviour you want this call to follow.
The Acknowledged toggle: If you first want to press 1 to “acknowledge” a call rather than just picking up the phone before answering the call, this can be turned on using the toggle. By default, this is turned off.

You can also tell the system to automatically behave a certain way as soon as the call hits the extension (rather than ringing first, and then following a command). You can ask the call to immediately Dial an “outside” (external) phone number, go straight to voicemail, follow a path to another extension, go directly to a queue or immediately hang up.
Alternative Dial Sequence
This is a more advanced configuration that can be extended to up to six steps. It enables complex find-me / follow-me rules to be defined in which the extension dials around to various locations, as administered. It can be further defined by a Time of Day Schedule for the Dial Sequence.
For detailed instructions on this set up - please go to the Find Me Follow Me Article
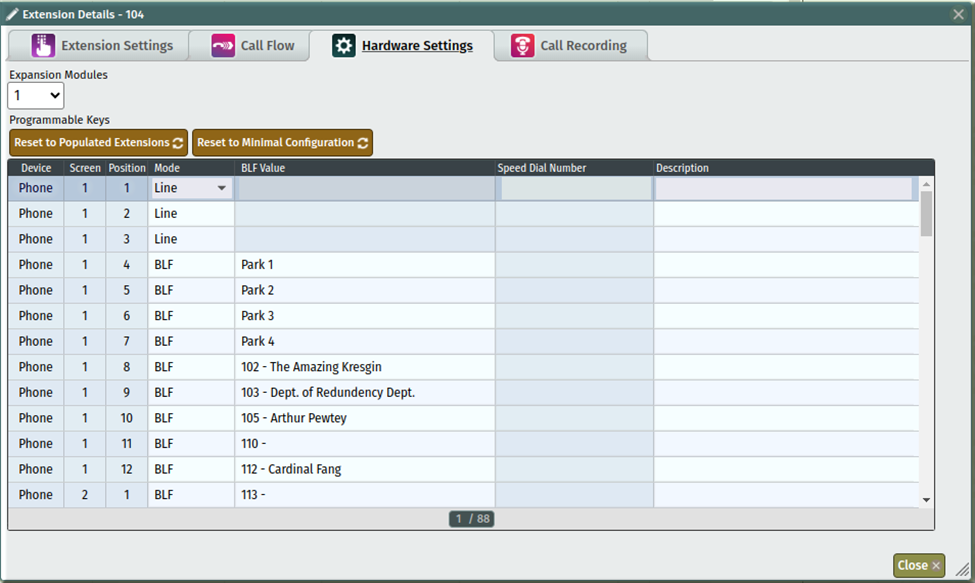
Hardware Settings
For Grandstream Only:
Programmable Keys – This option is shown only when this extension is set as a Grandstream Model Desk Phone. This can be used to custom program the line keys on the users Grandstream phone for them, rather than the user using the phones menu options.
For Instance, on the first screen of the phone using the 1st line key – The user wants this to be a speed dial.
They want the second key on the first screen to show Dmitry’s extension when it is busy or available using the busy lamp field (BLF) feature. They want the 3rd Key on the first screen to be a line key so that the user can pick up another call on that line.
Additionally, you can add programmable keys specifically to extension modules that may be connected to your Grandstream.
Call Recording
If Call Recording has been enabled and the extension has been set for recording, you can find and listen to the calls for this extension.
To retrieve call recordings:
Choose the start date and end date of the recordings you’d like to listen to.
Click on View Report.
On the target line item of the call you want to listen to simply click the play button. You will notice a “player” within the duration field of the line item you want to listen to.
Within the player, you can pause or slow/speed up the recording (click on the ellipses to access speed).